


SAM User Guide
Written by nevena
Created: 28 June 2007
Last Updated: 28 June 2007
See also: Setting up SAM
Setting Up a SpacialNet Account
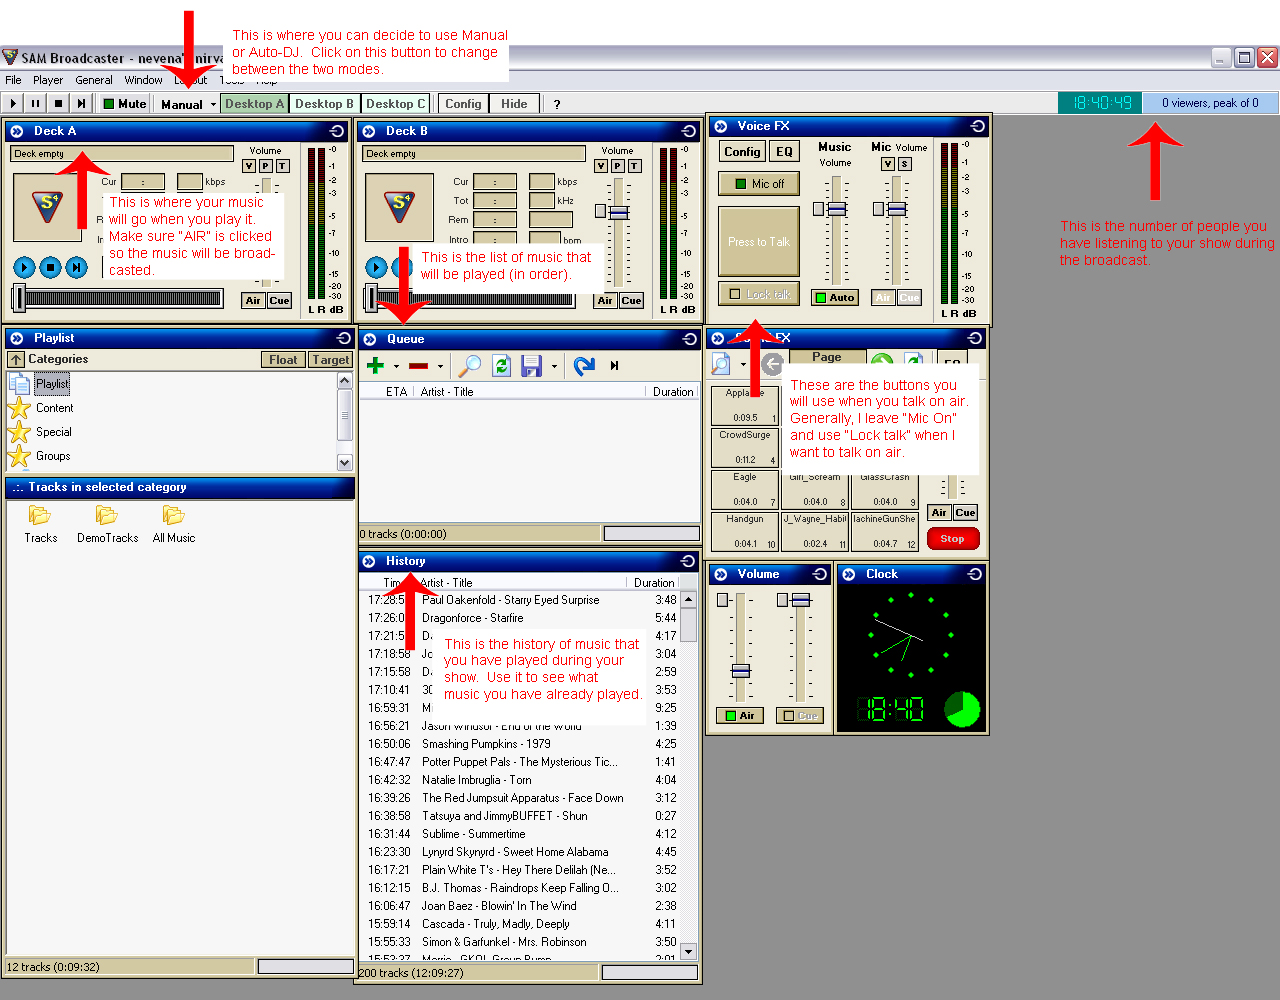
- Click here for an overview of what you'll be using for the most part.
- Click on the plus sign in your "Queue" box.
- Click on whatever music you want from the music destination.
- Music will automatically play in the order you have them in your queue (if you're using Auto-DJ or Play Queue). You can have an unlimited number of songs in your queue.
- Drag and drop music from your queue. If you are using Auto-DJ or Play Queue, SAM will load music into Deck A first, then to Deck B, and so forth.
- Deck A/B has controls much like any music-player. You can pause, play and go to the end of the song using the buttons in the Deck boxes.
- On the far right of each Deck, you will see the volume at which the music is broadcasting. You will want your music to be in the "green zone". If it's too low or too high, you can adjust the volume of that song in the Deck box.
- Word of importance: MAKE SURE YOUR DECKS ARE "AIR" ENABLED (corners of the decks). Otherwise, if you have "cue" enabled, the music will not play over the air.
- Generally, leave "Mic On" in the "Voice FX" box. To switch from "Mic Off" to "Mic On", just click on "Mic off". This does not mean you're going to be talking on air - it just means that SAM is enabled to allow you to talk to air.
- Your voice will not be broadcasted until you click on "Lock talk".
- If you want to be really stubborn, you can click on "Press to talk" - but you have to keep the button depressed the whole time you want to talk.
- You will want your voice levels to be in the green to yellow zone in the dB range (which is on the far right side of the "Voice FX" box). Red means you are shouting, and may be blowing out your listeners' ears.
- When you're done talking, you can click "Lock talk" again to turn the mic off (or release the mouse if clicking on "Press to talk").
- SAM allows you to talk over music, and it will automatically fade the music when you click "Lock talk" or "Press to talk". Sometimes, your music may be too loud, and listeners can't hear what you're saying if you talk over the music.
- You can lower the music and mic volumes in the "Voice FX" box. Again, you will want your music and your speaking voice to be almost the same level so listeners won't have to raise the volume when you're playing music, and lower it when you're talking.
- Auto-DJ means SAM will play your music in the order that it is in your queue. If you run out of music in your queue, it will automatically go to the oldest song in your history.
- It is possible to re-program your Auto-DJ rules by going to Config >> Playlist rotation rules and then clicking the "Configure" button. Play with this only after you've gotten the hang of using the other SAM features.
- Manual means that SAM will play that one song you are playing, and go into silence.
- Unless you plan on talking on air after that song, you should generally keep it on Auto-DJ.
- SAM has another Desktop that you will be using, called "Desktop B". You will be using this at the start of your show, as well as during your shows.
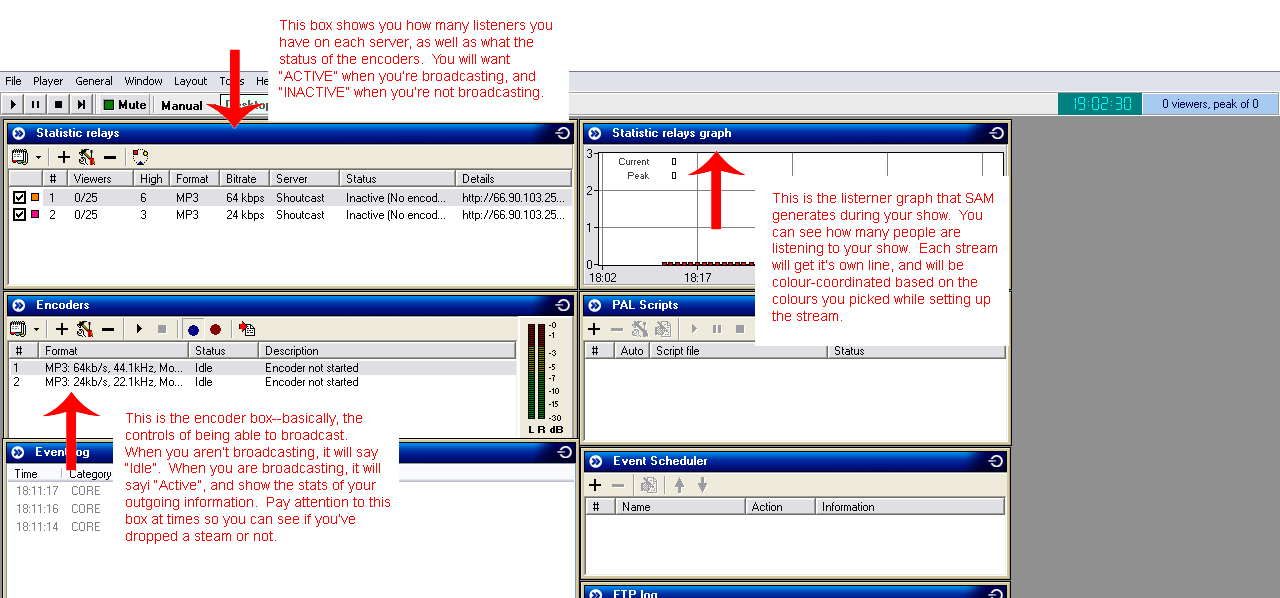
- Click here for a highlight of some of the things you see in Desktop B.
- You can start the streams one of two ways. Either click on one of the encoders in the "Encoders" box, and press the keys CTRL-F9. Alternatively, you can right click on one of the encoders in the "Encoders" box and go to "Start All".
- You must wait until both streams say "Active" under the status before you send out music - otherwise, the listeners won't hear it until it's active.
- NOTE: You must have the blue circular button clicked on in the "Encoders" box. Otherwise, the listeners will hear silence when you're playing music, but will hear you talk when you want to talk.
- Again, you can end the stream in one of two ways. Either click on one of the encoders in the "Encoders" box, and press the keys CTRL-F10. Or, you can right click on one of the encoders in the "Encoders" box and go to "Stop All".
- Your stream will go into "Idle" under status when you aren't streaming.
- Remember, if there is a DJ on after you, to do a private countdown with them when preparing to end the stream, so that they can connect as close as possible to the same instant as when you disconnect.
- You'll be able to tell if the stream disconnects from the "status" in the encoder box, or if your statistic relays suddenly drop to 0 listeners for an extended period of time. (Don't panic, sometimes the statistic relays drop momentarily for no particular reason).
- Kill that particular stream by right clicking the disconnected stream, and re-connect it by right clicking that stream and going to "Start" (or you can press F9 on your keyboard).
- Generally, this means you will drop all the listeners, but this is the fastest way.